How To Design A Website From Scratch in 11 Easy Steps
Published: June 17, 2024
In Melbourne’s competitive market, where about 500,000 small businesses compete, creating a website from scratch is much needed. A custom website helps your business stand out, displaying brand values, messages, and offerings, which helps connect with customers effectively. However, creating a website from scratch may seem daunting unless you have an expert by your side.
At BrandVillage, our web design Melbourne masters, simplify your website creation process. We’ll guide you through clear, easy-to-follow steps from the initial design to launching your site, ensuring it’s visually appealing and easy to navigate. This makes your site not just a tool but a growth engine for your business.
Ready to build a website that truly represents your brand? Follow along as we unveil the key steps to design your website from scratch, ensuring you make a powerful impact online through web design.
11 Major Steps to Design a Website from Scratch
Step 1 – Decide What Type of Website You Want to Make
Selecting the correct type of website. It is foundational in designing a site that meets your business goals.
- Start by defining the website’s primary purpose- selling products, showcasing a portfolio, sharing knowledge via a blog, or providing detailed company information. Understanding your target audience is crucial. Tailor your site’s design, tone, and content to match their preferences and behaviours.
- Identify the key functionalities your site needs based on its purpose. These include e-commerce capabilities or multimedia galleries.
- Evaluate your available resources budget, technical skills, and timeline. This determines the project’s scope.
- Finally, analyse your competitors. It ensures your website stands out and meets industry standards. These steps ensure that your website attracts and engages your target audience.
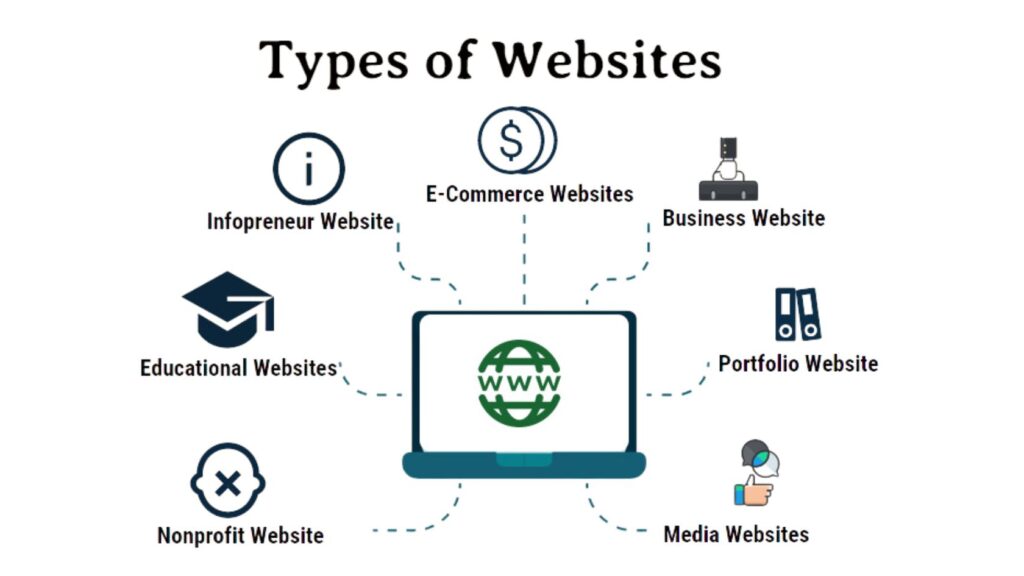
Types of Websites
- E-commerce sites are ideal for businesses selling goods or services online. They feature shopping carts, product catalogues, and payment systems.
- Blogs: Best for individuals or companies. Aims to establish thought leadership, enhance SEO, and engage with an audience through regular content updates.
- Portfolios: Suitable for professionals and creatives needing to showcase their work effectively to attract clients or job opportunities.
- Informational sites: These are used by organisations to provide comprehensive details about their missions, projects, or educational content.
Step 2 – Choose Your Website Builder

Once you’ve determined the type of website you need, the next step is to select the right website builder. This tool will be your primary resource for constructing your site. Opting for the one that aligns with your needs in terms of functionality and ease of use is crucial. Popular platforms include:
- WordPress: Highly customisable with extensive plugin options. Ideal for blogs, e-commerce website design, and those who want more control over their site’s design and functionality.
- Wix: Known for its user-friendly drag-and-drop interface. Wix is a good choice for beginners who need simple, visually appealing sites without coding skills.
- Squarespace offers beautiful templates and is also user-friendly. It suits artists, photographers, and small businesses looking for an elegant aesthetic with minimal setup.
When choosing a builder, try to find out the answers to the mentioned questions –
- Ease of Use: How user-friendly is the platform? Does it require coding knowledge?
- Customisation: Does it allow you to adjust every aspect of your site, or are you limited to predefined templates?
- Scalability: Can the platform grow with your business? Does it support the features you might need in the future?
- Support: Is there reliable customer support available? How robust are the help and community resources?
Spending 1 to 3 days evaluating these aspects is needed. It ensures you choose a website builder that meets your current needs and accommodates future growth and changes.
Step 3 – Pick Your Template
After selecting your website builder, the next critical step is to choose a suitable template. This template will serve as your website’s basic structure and design, so selecting one that aligns with the type of website you’re creating and your brand’s aesthetic is essential.
Here’s how to approach this decision:
- Alignment with Website Type: Ensure the template matches the purpose of your site. For instance, e-commerce templates should have features like product galleries and shopping carts. Blog templates might focus on text layout and media integration.
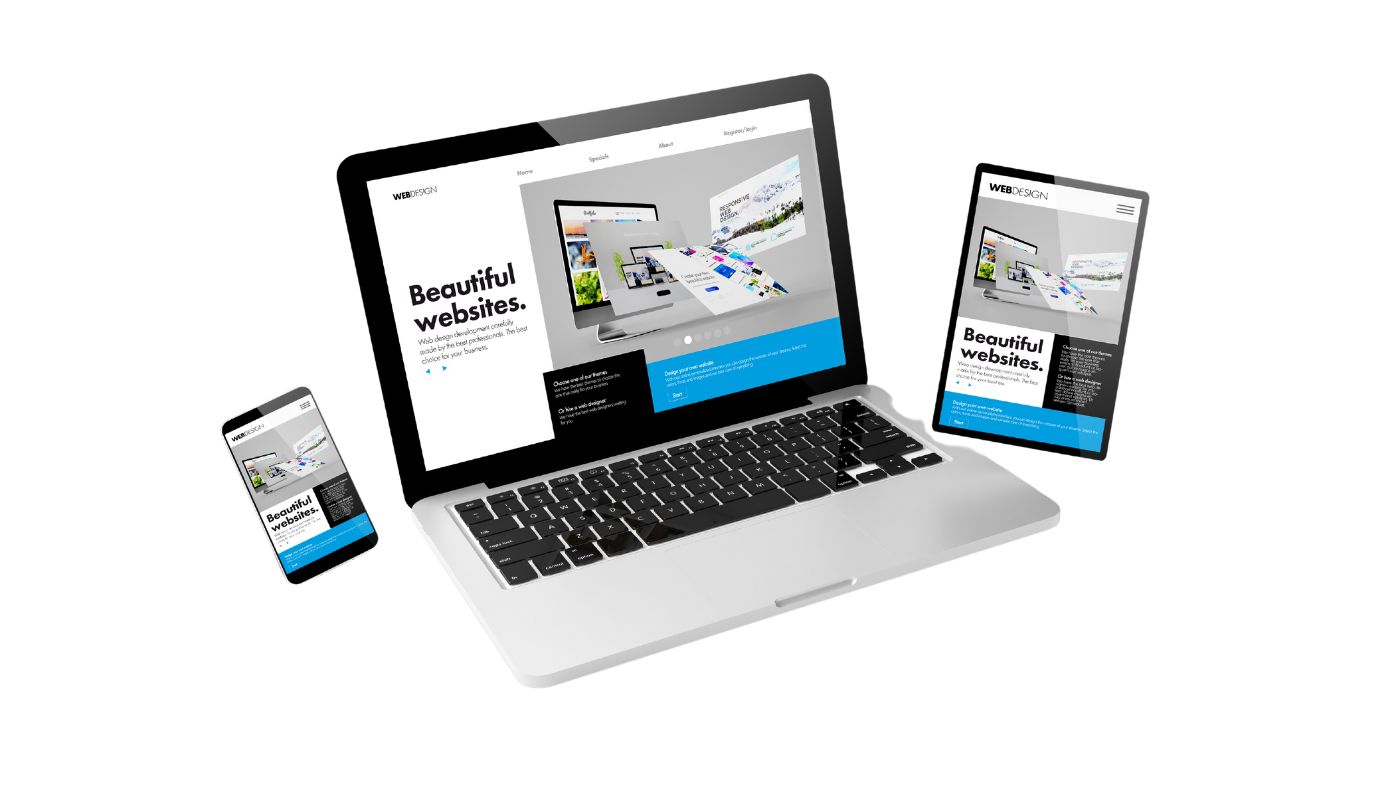
- Mobile Responsiveness: With mobile traffic increasingly dominating user interactions, choose a mobile-friendly template. Responsive web design ensures your site looks good and functions well on all devices, from desktops to smartphones.
- Customisation Options: Check the template’s flexibility. Can you easily change colours, fonts, and layout elements to match your brand? The more customisable the template, the better you can make it represent your unique brand identity.
- Features and Functionality: Review the template’s features. Does it include essential SEO tools, social media integrations, and user-friendly navigation? Ensure that the template supports all functionalities you need or plan to implement.
- Preview and Test: Most platforms allow you to preview templates. Take advantage of this feature to see how your content looks and feels. Some platforms also offer a trial period. It helps test the live template’s functionality, which can be invaluable.
Spending a week reviewing and testing various templates will be enough. This will ensure that the one you choose looks appealing and practical, enhancing your site’s user experience.
Step 4 – Customise Your Template to Your Brand
Customising your chosen template to reflect your brand identity is essential for creating a cohesive and memorable user experience. Here are the key steps to take during this phase:
- Adjust the colour scheme of your website template to match your brand’s colours. It fosters the immediate visual association.
- Select fonts that resonate with your brand’s style. It ensures they are legible and web-friendly.
- Incorporate your logo prominently on each page. It boosts brand recognition and adds custom icons that reflect your brand’s identity.
- Replace template images with your high-quality graphics. This personalise and enhance the site’s visual appeal.
- Modify the layout and navigation. It ensures they are intuitive and align with user needs. This will provide a seamless browsing experience.
- Maintain consistent branding elements across all pages to ensure uniformity and professionalism.
- Regularly preview your site as you customise. Make iterative adjustments based on how the components integrate live.
Spend 1 to 2 weeks on these tasks. They will help ensure that every aspect of your website reflects your brand’s identity and enhance recognition and trust among your audience.
Step 5 – Build Your Site Structure
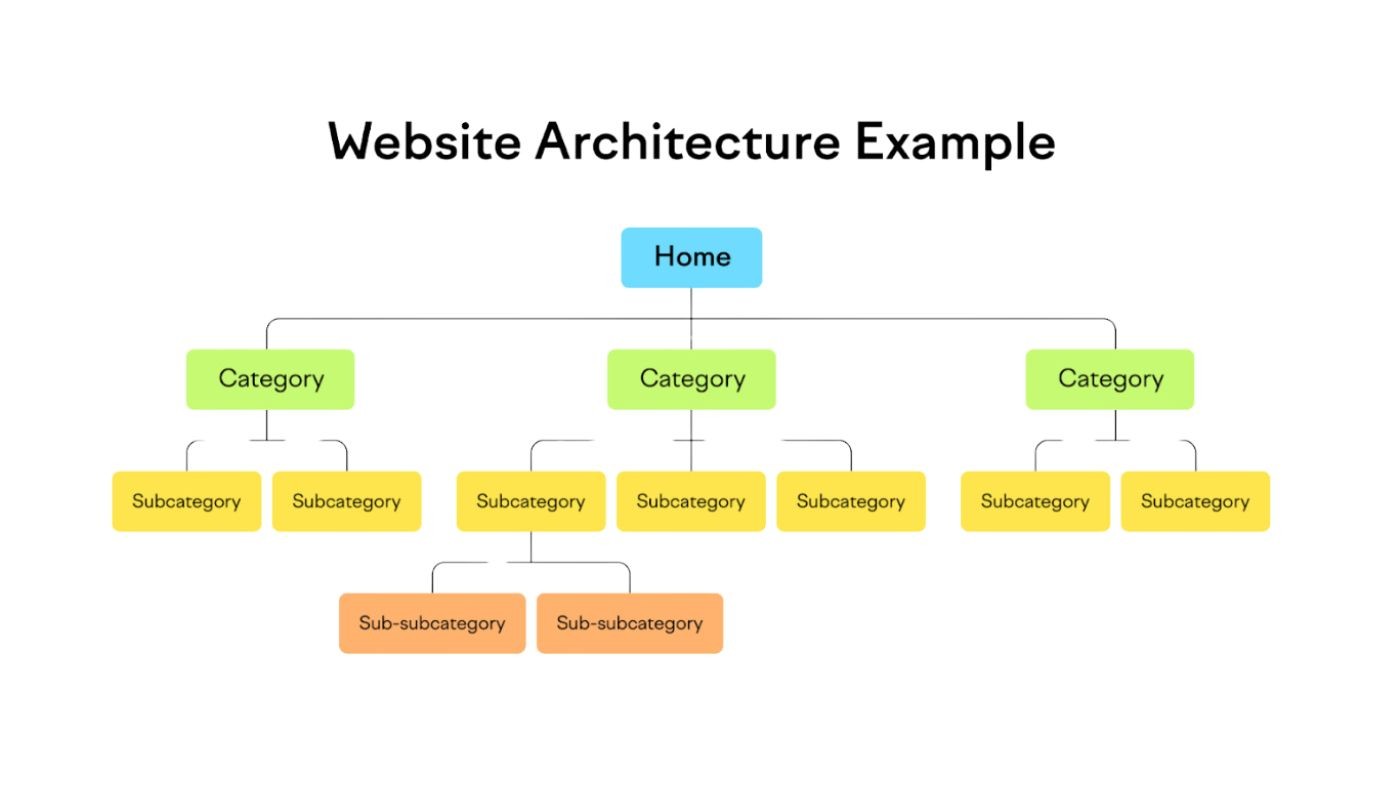
After you’ve tailored the template to your brand, the next step is building your site’s structure.
- Plan Your Site Hierarchy: Start by outlining a clear hierarchy of your website pages. It is based on the content and functionality you defined earlier. This hierarchy helps in organising information logically and intuitively. It ensures a seamless user experience.
- Design the Navigation: Create a navigation menu that reflects the hierarchy. This should include primary navigation for main pages (like Home, About Us, Services/Product, Blog) and secondary navigation for subcategories or essential but less prominent pages.
- Establish Linking Structure: Internally linking pages helps with SEO and enhances user navigation. Ensure that each page is easily accessible from multiple points. It improves the overall flow and ease of access across the site.
- Incorporate Usability Best Practices: Ensure your site structure supports ease of use. It must have clear labels for each link and a logical grouping of pages. Consider the path users take to reach critical information or perform actions like purchasing or signing up.
- Responsive Design Considerations: When building the structure, consider mobile users. Ensure the navigation and page elements adapt well to different screen sizes and orientations.
- Use Breadcrumbs: Adding breadcrumbs can help users understand their location within your website hierarchy. It makes navigating to previous pages easier.
By carefully planning and implementing your site structure, you can create a visually appealing and easy-to-navigate website that enhances the overall user experience and engagement.
Step 6 – Add Your Pages
Adding well-structured pages to your website is essential to help users navigate and switch to the pages easily. Here’s the list of pages you must include in your website –
- Home Page: This is the main gateway to your website. It features your logo, business name, summary of offerings, and an easy-to-navigate menu.
- Product or Service Page: This page details your offerings with purchase options. It includes individual product details or service descriptions.
- About Us Page: Introduces your brand and team. It highlights what makes you unique and your business values.
- Blog Page: This page houses your blog posts. It engages visitors with regular content. It features snippets and easy navigation to total posts.
- Contact Page: Provides contact methods like phone, email, and live chat. It also includes a contact form and physical address if applicable.
- Custom 404 Page: A friendly error page that helps lost visitors find their way back to valuable content.
- FAQ Page: Answers common questions. It streamlines customer support and provides valuable information upfront.
- Testimonials Page: Showcases customer reviews and endorsements to build trust and credibility.
Craft these pages carefully, taking 2-3 weeks. Ensure that they are thoughtful, informative, and aligned with your brand. It must enhance the overall effectiveness of your website.
Step 7 – Fill Your Pages with Engaging Content
Filling your website’s pages with engaging content is vital. It captures and retains visitor interest. This phase involves writing text and selecting or creating images. It also incorporates videos that resonate with your audience. Here’s how to approach this task:
- Develop Compelling Text: Each page should contain clear, concise, and engaging text. It must effectively communicate your message. Please pay special attention to your headlines and key information points. Make them impactful and easy to understand.
- Use High-Quality Images: Images can dramatically enhance the appeal of your website. Choose relevant images that add value to the content. Ensure they are high-resolution and professionally presented.
- Incorporate Videos: Videos can be a powerful tool for engaging users. Include videos that enhance your understanding of your product or service. These can be tutorials, testimonials, or behind-the-scenes looks.
- SEO Optimisation: Make sure all content is optimised for search engines. This includes using relevant keywords naturally, optimising meta tags and descriptions, and ensuring all images have alt text.
- Consistency is Key: Maintain a consistent tone and style that reflects your brand across all content to strengthen your brand identity and improve user experience.
Spending 2 to 4 weeks on this step is expected. It ensures the content is engaging and designed to improve site visibility and traffic.
Step 8 – Find and Purchase a Domain Name

A domain name is your website’s address on the internet. It is crucial for brand identity and making a solid first impression. Here’s how to select the right domain name:
- Brand Alignment: Choose a domain name that aligns with your brand and is easy to remember. It should be short, easy to spell, and free of hyphens or numbers unless they are a part of your brand.
- Keyword Consideration: Include keywords related to your business. It enhances SEO and keeps it natural and brand-focused.
- Domain Extension: Decide on the appropriate domain extension (.com, .net, .org, .biz, etc.). While .com is the most popular, choosing an extension that fits your business type can also be effective.
- Availability Check: Use domain registration platforms. These check the availability of your chosen name. If it’s already taken, these platforms usually suggest variations.
- Registration: Once you decide on a domain name, register it. This typically involves a small annual fee.
Choosing and registering a domain name usually takes just a day.
Step 9 – Review and Publish
Before launching your website, conduct a comprehensive final review. It is crucial to ensure everything functions as expected. Here’s what this step involves:
- Test Functionality: Check all interactive elements. These include forms, carts, and login processes, to ensure they work seamlessly.
- Review Links: Test all internal and external links to ensure they lead to the correct pages and that there are no broken links.
- Check Responsiveness: Confirm the website displays correctly across different devices and browsers. This ensures all visitors have a good user experience, regardless of how they access your site.
- Final Adjustments: Based on your findings during testing, make any necessary adjustments to refine the user experience and functionality.
This phase is critical for polishing your website and should take between 1 and 2 days to complete. It ensures that your website is ready for public access.
Step 10 – Promote Your Website

Once your website is live, promoting it effectively is essential to attract visitors and grow your audience. Here are key strategies:
- Social Media: Leverage platforms like Facebook, Instagram, LinkedIn, and Twitter. Share content from your website and engage with your audience.
- SEO: Implement search engine optimisation techniques. These improve your website’s visibility in search results. It includes keyword optimisation and building backlinks.
- Email Marketing: Develop a campaign to send subscribers updates, promotions, and valuable content.
- Online Advertising: Consider paid advertising options. It include Google Ads or social media ads to drive targeted traffic to your site.
Promotion should be ongoing to maintain and increase website traffic and visibility.
Step 11 – Establish Healthy Site Maintenance Habits
Time Required: Ongoing
Regular maintenance is vital to keep your website functioning optimally and securely. Here are essential maintenance practices:
- Update Content: Regularly update your website’s content to keep it fresh and relevant. This will not only engage users but also boost SEO.
- Check for Broken Links: Scan for and fix any broken links. This improves user experience and SEO performance.
- Update Software and Plugins: Keep all website software and plugins current. It protects against security vulnerabilities and ensures compatibility.
- Monitor Performance: Regularly check your website’s performance metrics, including load times and downtime, to ensure it remains fast and reliable.
Establishing these habits ensures your website functions smoothly and remains secure against threats.
Conclusion
Designing a website from scratch is about more than just launching it. It involves careful planning of your platform, filling pages with engaging content, and ensuring intuitive navigation and mobile responsiveness.
At BrandVillage, our approach goes beyond the usual. We emphasise detailed, client-inclusive processes where every step involves your feedback, ensuring your website meets and surpasses expectations.
Recognised in Melbourne for our expertise, we invite you to consult with our top-tier web designers or view our portfolio to see how we can elevate your online presence.
Articles.

July 2024
What is a Website Hosting Service?
Did you know that 88% of web users abandon sites due to poor performance? Also,...

July 2024
What is Branding in Marketing?
Branding sets a business apart, influencing: 34.6% of shoppers to repurchase 89% buy from...

July 2024
7 Commonly Used Branding Strategy
In Melbourne’s vibrant and ever-evolving market, a strong brand is no longer an option;...